Car Battery Replacement: How to Install a New Battery Safely
Replacing a car battery is a standard but critical maintenance procedure. The battery (ACC) serves as the core of the vehicle's electrical system, providing the necessary cranking amps to start the engine and powering onboard electronics when the engine is off. Incorrect installation or ignoring signs of wear can lead to serious consequences, including electronic control unit (ECU) failures, alternator damage, or short circuits. Understanding how to change a car battery yourself can prevent roadside breakdowns and reduce maintenance costs.
When to Replace the Battery
The average service life of a modern maintenance-free battery is between 3 and 5 years. Actual longevity depends on operating conditions, climate, and the health of the vehicle's electrical system.
Common symptoms of battery wear:
- Difficult engine start. The engine cranks slowly, particularly in cold weather.
- Dashboard warnings. The battery icon or a "Check Battery" message appears.
- Dimming lights. Headlights appear weaker at idle, or the dashboard flickers during ignition.
- Case deformation. The battery walls appear swollen due to overcharging or overheating.
- Odors. A sulfur smell (similar to rotten eggs) indicates electrolyte leakage or boiling.
Extreme temperatures significantly impact battery capacity. Cold weather slows chemical reactions and reduces cranking power, while high heat accelerates plate corrosion and electrolyte evaporation, often leading to battery failure at the start of the following cold season.
Required Tools and Materials

Ensure you have the following equipment ready before starting the procedure:
|
Tool/Material |
Purpose |
|
New Battery |
Must match the original specifications (Ah, CCA) and dimensions. |
|
Wrenches (typically 10mm and 13mm) |
To loosen terminal clamps and mounting brackets. |
|
Protective Gear |
Gloves and goggles to protect against electrolyte and sparks. |
|
Wire Brush |
To remove oxidation from contacts. |
|
Shop Cloth/Rag |
To clean the battery tray. |
|
Dielectric Grease |
To protect terminals from future corrosion. |
Important: In many modern vehicles (especially European models), replacing the battery may require an OBD-II scanner to "register" the new unit within the energy management system.
Vehicle Preparation
Safety is the primary priority. Park the vehicle on a level surface, engage the parking brake, and set the gear selector to "Park" (for automatics) or Neutral (for manuals).
Turn off the ignition and remove the key. Ensure all electrical loads—such as lights and the audio system—are switched off. In vehicles with complex electronics, it is recommended to wait 15 minutes to allow the control modules to enter "sleep mode." Before removing the old battery, verify the polarity of the new unit. The positive terminal (+) is usually larger in diameter and covered by a red cap. Reversing polarity during connection will cause immediate damage to the alternator’s diode bridge.
Removing the Old Battery

Following the correct sequence prevents short circuits caused by tools contacting the vehicle's chassis.
- Disconnecting the Negative Terminal. Work must always begin with the "negative" terminal, which is typically identified by a black color, a "–" symbol, or a cable connected directly to the vehicle's chassis (ground). After loosening the retaining nut with a properly sized wrench (usually 10 mm), remove the clamp and move it as far aside as possible to prevent accidental contact with the terminal post during the procedure. This step is critical: by breaking the electrical system's connection to the vehicle's ground, you ensure safety against short circuits. If your metal wrench accidentally touches the chassis or engine components while working on the "positive" terminal later, no sparking or shorting will occur because the circuit is already broken.
- Disconnecting the Positive Terminal. Once the ground is disconnected, move to the positive terminal, which is usually protected by a red plastic cap and marked with a "+" symbol. Slide or flip back the protective cover, loosen the fastener, and carefully remove the clamp. Proceed smoothly to avoid deforming the lead terminal post or damaging the heavy-duty power cables attached to it. With both cables removed, the battery is now completely isolated from the onboard electrical system.
- Removing the Mounting Elements. The battery is not merely resting on its tray; it is rigidly secured to prevent vibration and shifting during vehicle operation. Depending on the vehicle's design, you will need to unscrew either a top pressure plate that crosses the center of the battery or a retaining bracket that holds the lower lip of the casing (this may require a socket wrench with an extension). Ensure all bolts and nuts are stored in a secure location so they do not fall into the depths of the engine compartment.
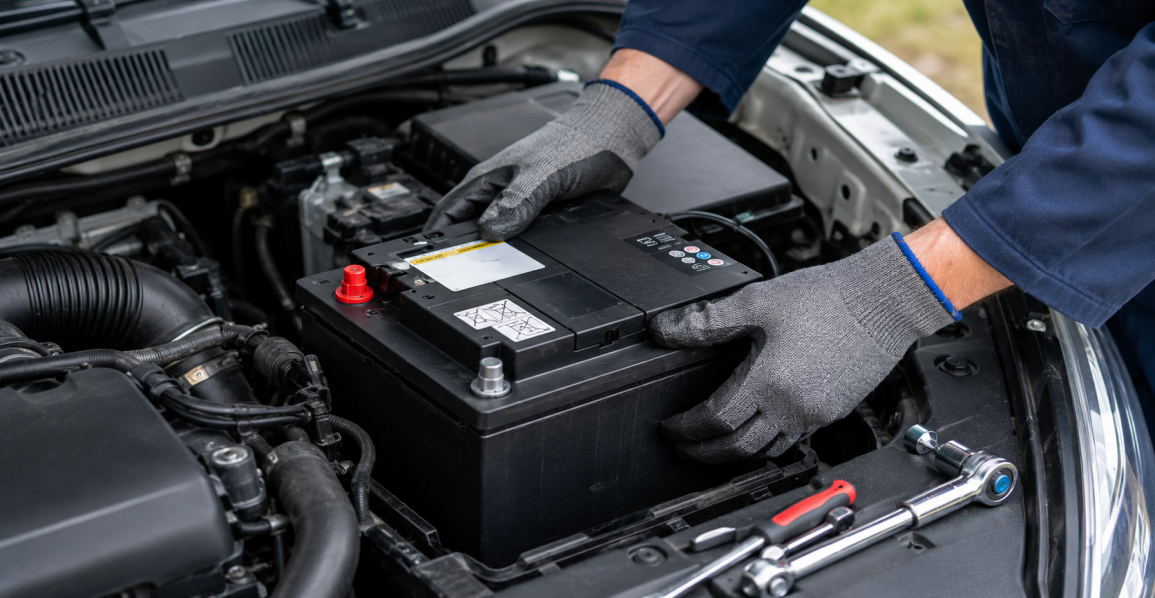
- Extracting the Device from the Engine Bay. When lifting the battery, account for its significant weight, which averages between 15 and 25 kg. If the unit is equipped with folding handles, verify their integrity before pulling upward. Extract the battery smoothly, taking care not to snag fragile plastic parts, hoses, or sensors located nearby. It is vital to keep the casing strictly vertical: even maintenance-free models have vent holes through which electrolyte—a sulfuric acid solution—can leak if tilted sharply. This acid can cause chemical burns and instantaneous metal corrosion.
- Sanitizing the Mounting Area. Once the old battery is removed, the tray must be prepared for the new installation. Closely inspect the tray: remove accumulated dirt, leaves, and foreign objects. If white crystalline deposits or streaks are visible on the metal, these are signs of acid leakage. Such contaminants must be neutralized with a baking soda solution, then thoroughly rinsed with water and wiped dry. A clean, dry mounting surface prevents chassis corrosion and ensures the new battery sits level and stable, preventing any misalignment.
Once removed, inspect the battery tray for debris or signs of corrosion and clean as necessary.
Cleaning and Preparing Contacts

Installing a new battery on dirty or oxidized terminals is ineffective. Buildup on the clamps creates resistance, preventing the alternator from fully charging the battery.
Use a dedicated terminal cleaner or a baking soda solution to neutralize acid residue. Scrub the internal surfaces of the clamps with a wire brush until the metal is bright. Inspect the cables for cracked insulation or frayed wires. After cleaning, apply a thin layer of dielectric grease to the terminals to prevent future oxidation.
Installing the New Battery
Installation follows the exact reverse order of removal. Place the new battery in the tray, ensuring it sits flat and secure.
Connection Procedure:
- Tighten the hold-down brackets. The battery must remain stationary during vehicle operation.
- Connect the Positive (+) Terminal First. Place the clamp on the post and tighten the nut.
- Connect the Negative (-) Terminal Second. A small spark during contact is normal as the vehicle systems draw initial power.
- Reinstall all protective plastic covers.
Verify the connections by firmly shaking the clamps; they should not rotate or move on the posts. A loose connection will cause ignition issues and terminal overheating.
Post-Installation Testing
Once the installation is complete, test the system. Turn the ignition key to the "ON" position.
Start the engine. The start should be immediate and vigorous. Check the instrument cluster; the battery indicator light should turn off immediately after the engine starts. Test the functionality of all systems, including power windows and lights. You may need to reset the clock or initialize automatic window positions. If you notice any unusual odors or smoke, shut off the engine immediately.
Maintenance Tips
To maximize the lifespan of the new battery, follow these maintenance guidelines. Periodically check the battery case for cleanliness; dirt on the surface can facilitate parasitic power draw.
Avoid deep discharges. If the vehicle will not be used for more than 14 days, use a maintenance charger (trickle charger) or disconnect the negative terminal. Use a multimeter to check the charging system voltage while the engine is running; it should typically stay between 13.8V and 14.4V.
Common Installation Errors
Avoid these typical mistakes to protect your vehicle's electronics and the battery itself:
- Incorrect Disconnection Sequence: Removing the positive terminal while the negative is still connected risks a short circuit if the wrench touches the car's body.
- Mismatched Specifications: Using a battery with lower Ah or CCA ratings will lead to premature failure, especially in cold climates.
- Overtightening: Excessive force can crack the plastic casing or damage the lead terminal posts.
- Ignoring Contact Corrosion: Dirty terminals result in chronic undercharging.
When to Seek Professional Assistance
Certain scenarios require specialized skills and equipment:
- If the battery is located in an inaccessible area (under a seat, inside a wheel arch, or in the trunk).
- If the vehicle uses a Start-Stop system (requires AGM/EFB batteries and software registration).
- If you lack the proper tools for cleaning and torquing the connections.
Correct car battery replacement ensures a reliable engine start and stable performance of all electronic systems. Adhering to safety protocols and technical procedures is essential for the long-term operation of the vehicle. Following these steps makes the process straightforward and safe.
